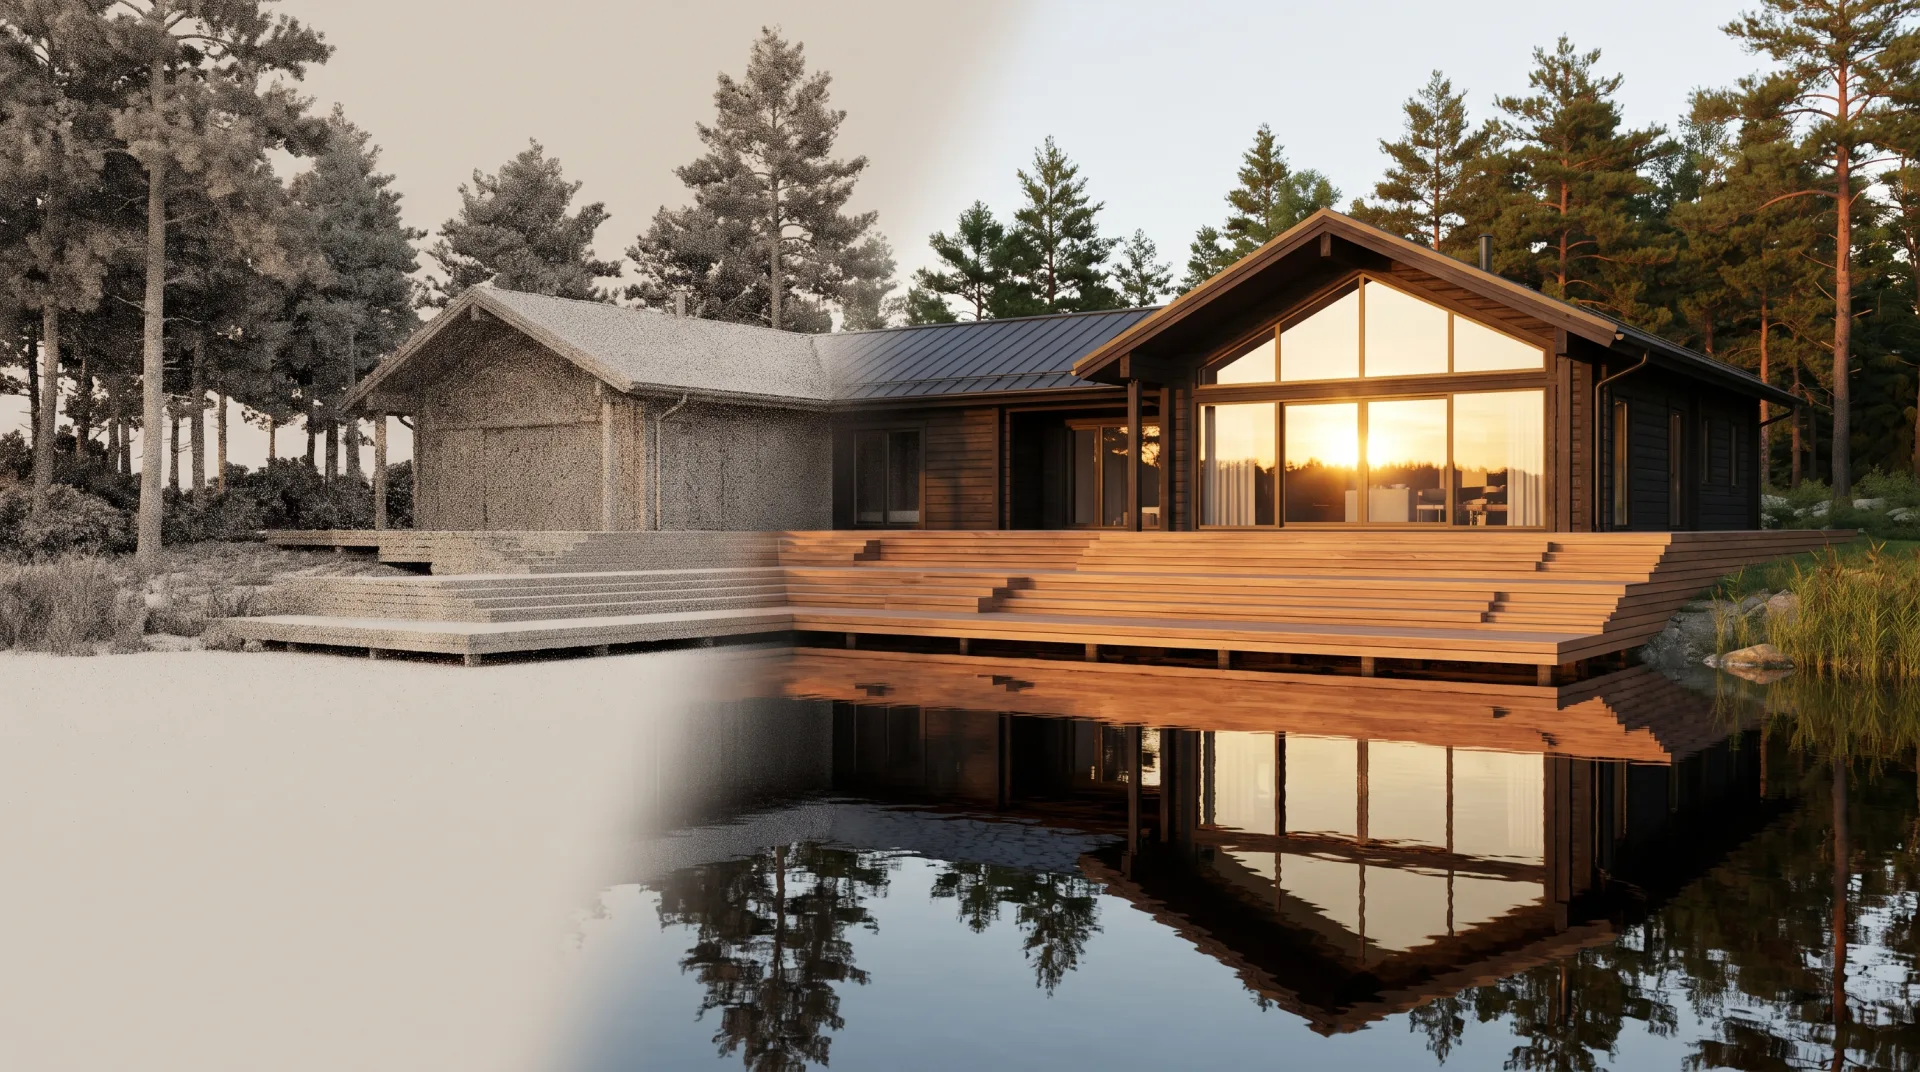
This page is about 3D image rendering, not the browser's render process or animal rendering. If you need the definition first, start with our page on what rendering in 3D means. Here we follow one house through all six steps, explain the pipeline inside the software, compare the types and techniques of rendering, list the mistakes that make house renders look fake, and show how we run the workflow on a client project.
What are the steps of rendering?
The six steps of rendering are modeling, texturing and materials, lighting, camera setup, rendering (the computer's calculation), and post-production. The process of rendering always runs in this order, because each step needs the one before it:
- Model the geometry. Build the house at real dimensions from drawings, CAD or BIM files, or import an existing model.
- Assign textures and materials. Give every surface a physically based material: brick, cedar, glass, zinc, lawn.
- Light the scene. Set the sun and sky, or an HDRI of a real sky, plus any interior and landscape lights.
- Set the camera. Choose the viewpoint, height, lens and framing, as a photographer would on site.
- Render. Let the engine calculate the light for every pixel, on the CPU or GPU; the trade-offs are covered in GPU vs CPU rendering.
- Post-produce. Grade color and contrast, refine sky and planting, add people where wanted, and export.
The loop above runs the six steps on one suburban house: wireframe, clay, textured, lit, framed, and the final graded image. On a real project the first four steps take most of the hours; the render itself is the step people picture but rarely the longest.
What does rendering process mean?
In 3D graphics, the rendering process means the computer calculation that converts a 3D scene into a 2D image, and in a studio it also means the whole project workflow from drawings to final image. The two senses overlap but are worth keeping apart. When a software manual describes the render process, it means step 5 above: the engine computing light and writing pixels. When a client asks a studio about its render process, they mean all six steps plus the briefs, drafts and approvals around them. The rest of this page covers both, in that order.
What is a rendering pipeline?
A rendering pipeline is the fixed chain of stages software uses to turn geometry into pixels: geometry processing, rasterization or ray tracing, shading, and output to an image. The term graphics rendering pipeline usually refers to the version built into graphics cards for real-time work, where the visibility stage uses rasterization rendering. Offline engines run a similar chain but replace that stage with ray or path tracing.
| Stage | What happens | Example in an architectural scene |
|---|---|---|
| Geometry processing | Vertices are moved into the camera's view, hidden or off-screen objects are culled, and distant detail is simplified | The neighbor houses behind the camera are skipped; trees far down the street use lighter versions |
| Visibility | The engine finds which surface each pixel sees, by rasterization or by tracing a ray from the camera | The porch column in front hides part of the front door |
| Shading and light | Each visible point gets its material's color and the light reaching it, direct and bounced | Sun on the brick, sky light under the eaves, warm light bounced from the lawn onto the soffit |
| Sampling and denoising | Many samples per pixel are averaged and any remaining grain is removed | The grain in the shaded garage interior clears |
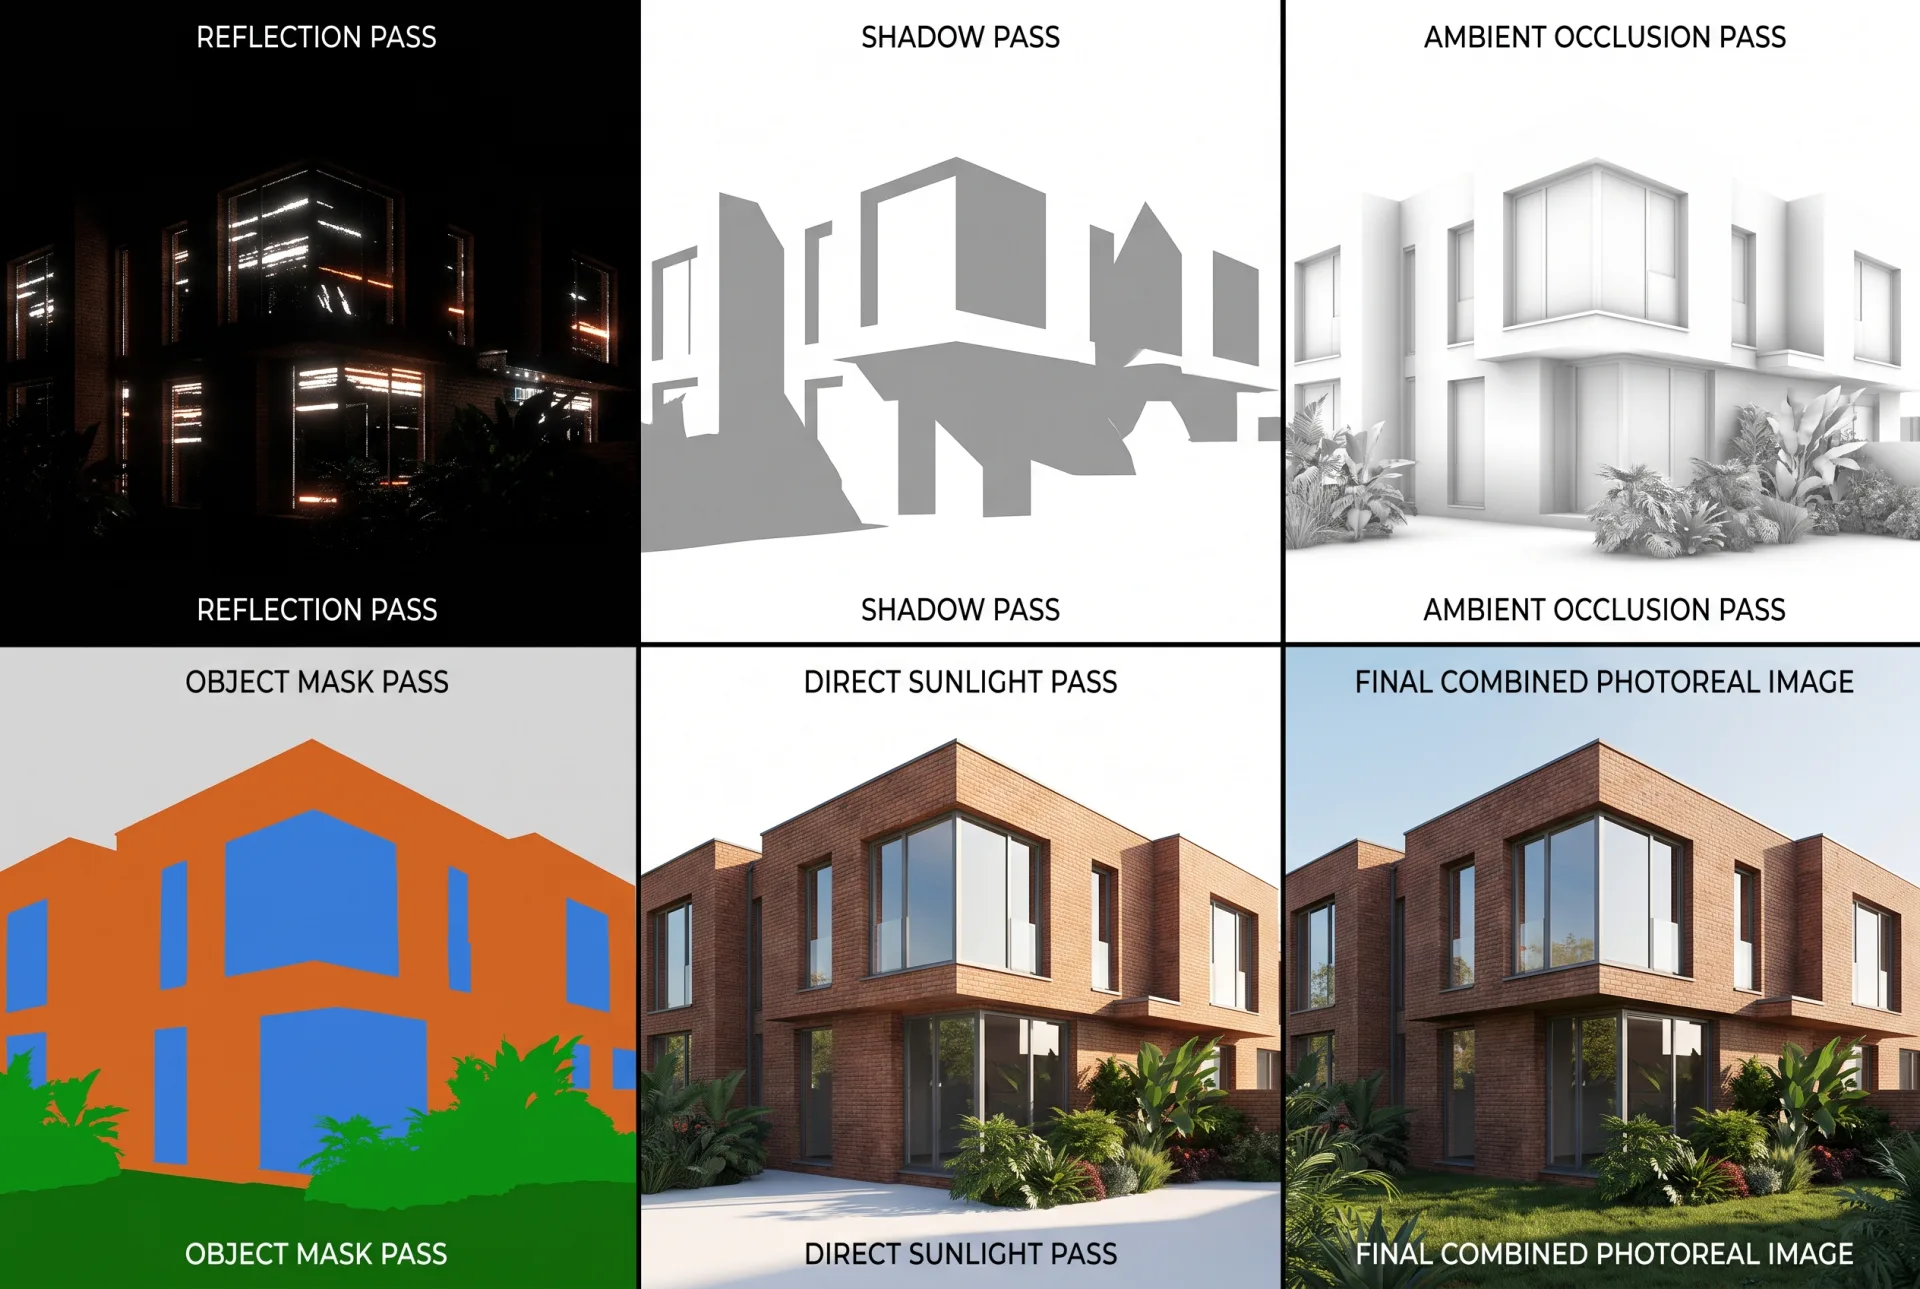
| Output | The final pixels are written to an image file, often with separate passes | A 4K image plus reflection, shadow and mask passes |
What are render passes?
Render passes are separate image layers saved from one render, such as reflections, shadows, ambient occlusion and object masks, which let the post-production artist adjust each one without re-rendering. If a client wants the windows a little brighter or the lawn a shade greener, the artist changes that pass alone. The passes are combined in post-production in Photoshop, which is why we can deliver a layered PSD on request.
What are the three types of rendering?
The three types of rendering most people mean are real-time rendering, offline (pre-rendered) rendering and interactive rendering, and they differ by how many seconds each frame is allowed to take.
| Type | Time per frame | Typical tools | Best for |
|---|---|---|---|
| Real-time rendering | Under a thirtieth of a second | Unreal Engine, Enscape, Lumion, Twinmotion, D5 Render | Walkthroughs, VR and design review; see real time rendering |
| Interactive rendering | A rough image in a second, refining while you watch | Interactive modes in offline engines, such as Corona's interactive rendering, which runs on the CPU | Setting up lights, materials and cameras before the final render |
| Offline rendering | Minutes to hours | Corona, V-Ray, Cycles | Marketing stills, approval images and animation |
What are the five rendering techniques?
The five rendering techniques usually listed are rasterization, ray casting, ray tracing, path tracing and radiosity, each a different way of calculating which light reaches the camera. Most photoreal architectural images today use path tracing. Our page on rendering techniques compares them in full.
| Technique | How it works in one line | Speed | Where you see it |
|---|---|---|---|
| Rasterization | Projects each triangle onto the screen and fills the pixels it covers | Fastest | Games, CAD viewports, real-time walkthroughs |
| Ray casting | Sends one ray per pixel (or per screen column) to find the visible surface, with no further bounces | Fast | Early 3D games such as Wolfenstein 3D, per Wikipedia; solid modeling |
| Ray tracing | Follows rays from the camera and spawns new ones for reflections, refraction and shadows | Slow offline, real time with hardware help | Reflective glass and water, hybrid game effects |
| Path tracing | Follows each ray through many random bounces and averages thousands of paths per pixel | Slowest, most accurate | Final architectural and product stills, film |
| Radiosity | Divides surfaces into patches and computes how much diffuse light passes between them | Slow to compute, then fast to view | Older lighting studies and baked lighting; listed among GI methods by Wikipedia |
What type of rendering is best?
Path-traced offline rendering is best for photoreal architectural and product marketing images, and real-time rendering is best for walkthroughs, VR and design review where speed matters more than the last few percent of realism. The image below makes the gap visible: same room, same model, two engines.
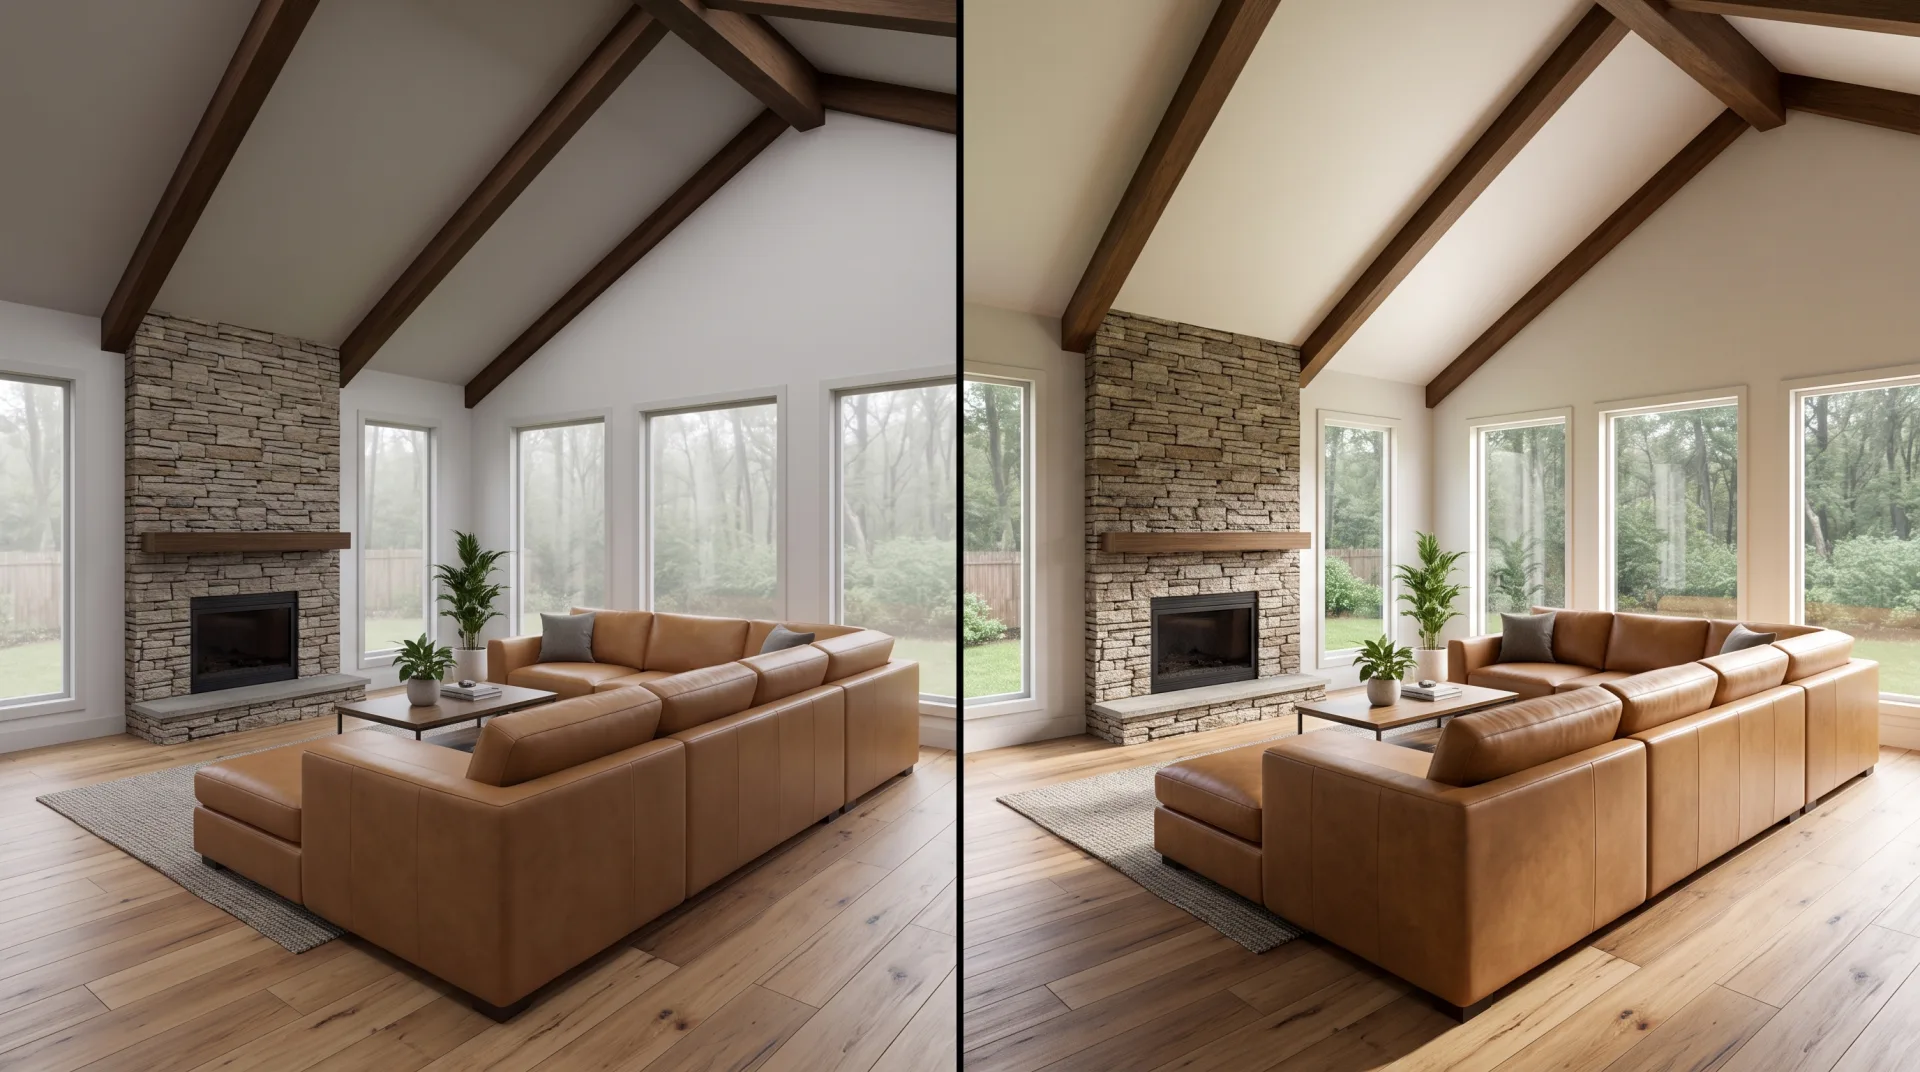
A simple rule: if the image will be printed, published or put in front of a buyer or a review board, render it offline. If people need to move through the design or change it during a meeting, use real time and accept the small loss in light quality.
How do you create a 3D rendering?
A 3D rendering is created by building or importing a 3D model, assigning materials, placing lights and a camera, rendering at the delivery resolution and finishing the image in post-production. Anyone looking up how to create 3D renders on their own can follow the same order a studio does. Many architects start from a SketchUp model; our page on rendering from SketchUp covers that route. How to create a rendering, for a self-taught reader, in six steps:
- Pick one modeler and one render engine. For example, Blender with Cycles, both free, or SketchUp with a renderer plugin.
- Build or import the model at real scale. Check that a standard door is about 2 m (6 ft 8 in) tall before anything else; wrong scale ruins light and materials later.
- Apply physically based materials. Use scanned or well-made textures and keep reflectivity realistic; very little in a house is a mirror.
- Light with a sun and an HDRI sky. Start with daylight from a clear direction before adding any artificial lights.
- Frame the camera like a photographer. Eye height around 1.5 m (5 ft), a lens between about 24 and 35 mm, and vertical lines kept vertical.
- Render, then post-produce. Render at the final resolution, then adjust exposure, color and contrast in Photoshop or a free editor.
That is how to make a 3D rendering that holds up. The difference between a first attempt and a professional image is mostly in steps 3 to 5, and in how many times each is repeated. If you would rather not, studios exist to create renderings from your drawings.
How do you learn 3D rendering?
3D rendering is learned by picking one modeling tool and one render engine, following a full interior project from model to post-production, and then studying real photography of light. Learning one complete project teaches more than ten tutorials on isolated features, because every step affects the next. The second skill is looking: photographs of real interiors show how light falls, how bright windows really are and where shadows go soft, which is what a render has to copy.
What are common house rendering mistakes?
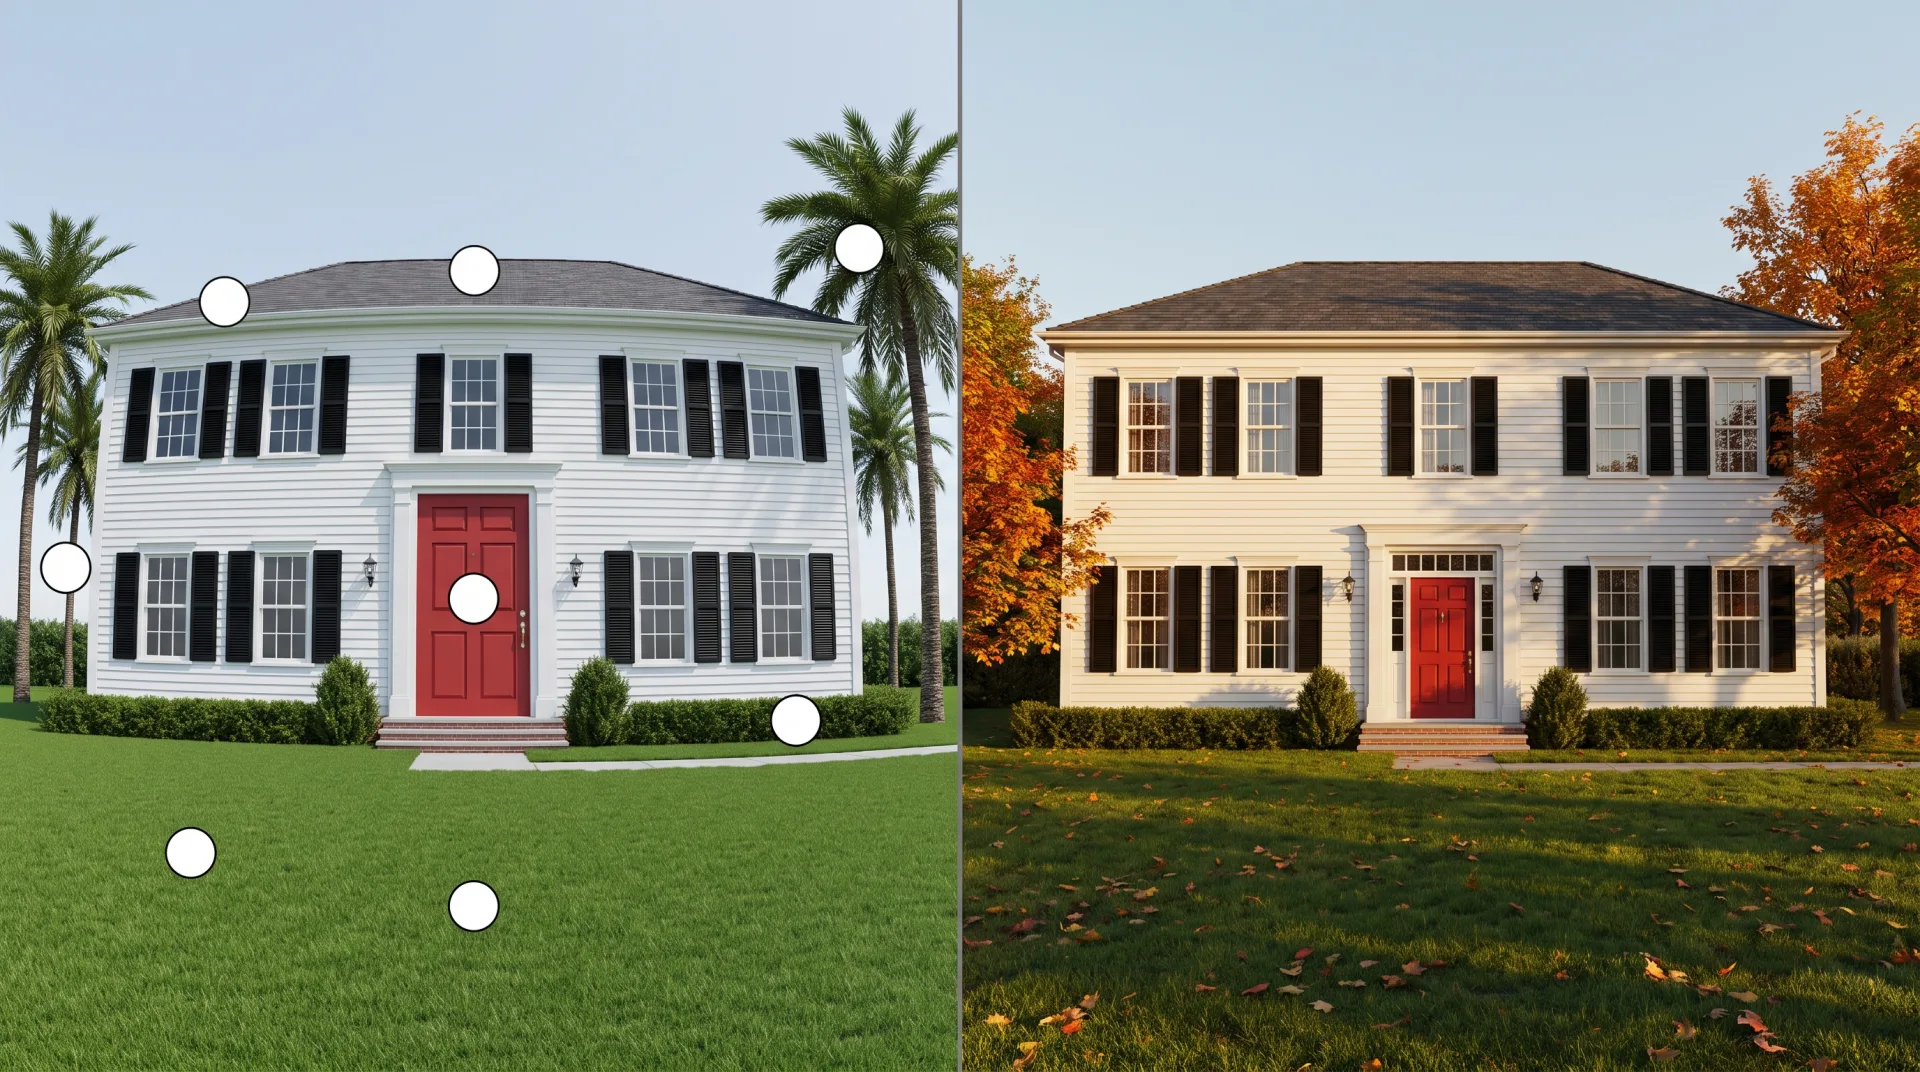
The most common house rendering mistakes are wrong scale, a camera set too high or too wide, perfectly clean surfaces with no wear, flat lighting with no sun direction, and entourage that does not match the region. Each one is easy to spot once named, and each is fixed before rendering, not after.
| Mistake | What it looks like | Fix |
|---|---|---|
| Wrong scale | Doors, steps or furniture that look giant or toy-like next to the house | Model from dimensioned drawings and check a door and a stair riser against real sizes |
| Camera too high or too wide | A drone-like view or stretched, curved edges from a very wide lens | Eye-level camera around 1.5 m (5 ft), a 24 to 35 mm lens, verticals corrected |
| Surfaces too clean | Spotless lawn, uniform paint and paving with no variation | Add subtle dirt, color variation in brick and grass, and slight weathering |
| Flat lighting | Noon light from overhead with no clear shadows, so the facade looks pasted on | Pick a sun angle that rakes across the facade, often morning or late afternoon |
| Wrong entourage | Palm trees in front of a house in Vermont, or cars and plants from another climate | Use planting, cars and sky that match the site's region and season |
How does the agency run the rendering workflow on a project?
We run each project as brief, model from the client's CAD or Revit files, clay-render camera approval, materials and lighting draft, final render and revisions, and delivery in the agreed formats. The rendering workflow starts with a brief; our rendering brief lists what to send. Here is what happens at each step and what you approve:
- Brief and files. You send drawings or a model with references, the views you need and your deadline. We accept Revit, SketchUp, Rhino, 3ds Max, AutoCAD and Archicad files, IFC, OBJ, FBX and STEP, and PDF drawings, sketches and photos. You approve a fixed quote, sent within 12 hours of receiving your files.
- Model. We build or prepare the model from your files at the level of detail the brief describes, so modeling is part of the job, not an extra. You approve nothing yet; we ask questions where drawings are unclear.
- Clay draft. We send each view as a gray clay render. You approve the camera, composition and massing while changes are still quick.
- Materials and lighting draft. We apply finishes, landscape, sky and light. You comment on materials, colors and mood. The first draft arrives in 3 to 5 business days.
- Final render and revisions. We render at full resolution and post-produce. Two revision rounds are included, so you can fine-tune finishes and light before sign-off.
- Delivery. You receive stills in 4K as JPG and PNG, with a layered PSD on request, and full commercial use of the images.
At 3DRenderingAgency, a US studio where a team trained in architecture and interior design runs every step above, plans, sections and finish schedules are read correctly the first time, so you spend fewer rounds on corrections and decide finishes and massing before money is spent on site. To start a project, send your files to our architectural rendering company and we will return a fixed quote within 12 hours; every service and its rate is on our 3D rendering price list.